New Target Boba Fett helmet released

IMG_2096_zpsseotzykp.jpg
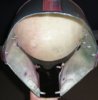
I am really impressed with this Target helmet considering the price! I lined up my "cheap" helmets as comparison in the pic. The left Jango is a Rubies (unaltered), second is the green interior Don Post (first attempt at painting years ago), third is the Target helmet and on the right is a 95 Don Post white interior. They finally got the shape and size pretty close! I'm impressed but there's a lot of alterations to do to it still but it's still easier than building your own from scratch (which I didn't include in the pic).
 
I really, really, really hope they decide to do another run of this helmet line. Maybe even make them better. They're just such a good deal for only $30!!
 
Whats the best way to put in a t-visor after removing the old one? Just glue it to the inside of the helmet?

Here is how I attached my visor in my MSH and MSH2 helmet back in the day,
attachment.jpg
and I will probably do so again in this helmet.

It is a proven method I did many years ago and is similar to the movie helmet.

Best of all It was removable and it had some air gaps you could not see to let the air move and escape to reduce fogging.

I used thumb screws and bent picture hangers from the pull bins from Lowe's epoxied to the inside to make it all work.

Lynn
 
Whats the best way to put in a t-visor after removing the old one? Just glue it to the inside of the helmet?

I just got done taking out the visor with my box cutter by scribing it and snapping it out, it only took ten minutes, it came out super clean with minimal sanding to clean it up. I decided it will need a lot of good reinforcing in this area. I will pack it with epoxy putty and make it flatter inside to have more flat area to have a better mounting area for mounting the visor.
Lynn

can you post some pics?
 
Man glad I found one! Grabbed the last one at my local target today. I'll be posting pics of my rebuild/paint in the forum. I have to agree with all of the review posts, although my visor is "brittle" it seems sturdy enough to leave in for now. Maybe they reworked the visors after a lot of complaints for them cracking.

- - - Updated - - -

Has anyone figured out what size to print Raff's stensils? 100% is a tad too small from the PDF. Unfortunately my printer is horrible when it comes to ink and I can't afford 30 pages of trial and error.
I went to FedEx kinkos and ask them to print it actual size and they measured it using the mouse on the screen and i got it back its like a 6ft. Poster!! Really detailed and super cool looking but way to expensive and now i have the same problem the scale is still off??!! I dont think this was his original scale im sure. Oh well.

Sent from my SM-N910P
 
I printed the red mandible front area at 105%, pretty close, a little long in the front, but a little shifting of the stencil should work fine. To be honest I don't have the time to tweek the hight and width of each stencil.
 
Could anyone order one of these and cut it to fit the visor area for this helmet? I bought one, tried to dremel it... and I ****ed it all up... I don't want to blow money on another one that I will ruin. if anyone could do that, I will pay for the face shield and any labor involved. I just want to finish this damned helmet but I don't posses the knowhow to do it without ruining it. thanks!
 
Could anyone order one of these and cut it to fit the visor area for this helmet? I bought one, tried to dremel it... and I ****ed it all up... I don't want to blow money on another one that I will ruin. if anyone could do that, I will pay for the face shield and any labor involved. I just want to finish this damned helmet but I don't posses the knowhow to do it without ruining it. thanks!

I was just wondering why you would cut it out with a dremel tool or when sharp regular house hold scissors or tin snips work fine and you will not mess it up?
Lynn
 
Thanks. Just curious, how do you plan to install the t-visor?

The white stuff is a full tube of plumbers epoxy putty I used to reinforce the visor area and make it more flat to mount the visor.
ATTACH]


I will mount my visor the same as I have done ,my old MSH and MSH2 helmets. I used modified picture framer hangers, thumb screws, and push pin screws to hold in the visor by pressure, it is similar to how the movie helmet was done. This way you can remove the visor at anytime if needed.

Lynn
 

Attachments

  • inside.JPG
    inside.JPG
    180.5 KB · Views: 422
I was just wondering why you would cut it out with a dremel tool or when sharp regular house hold scissors or tin snips work fine and you will not mess it up?
Lynn

I tried using scissors to terrible effect. It just did not end well. so I tried using a dremel to get a better cut and I just am not good with any hand tools really.
 
Thanks. Just curious, how do you plan to install the t-visor?

Ask and you shall receive. visor attatch.JPG visor.JPG
I did similar as I posted on my old MSH above. I used pin post screws with the screw part epoxied to the helmet, modified picture hangers, and nuts to hold everything together. I got to find some 8/32 thumb nuts to fit the screws instead of the nuts as it will make visor removal much easier.
Everything is tested, I just have to wait 24 hrs for the epoxy to fully cure before I put full pressure on them to hold down the visor.

Lynn
 
I tried using scissors to terrible effect. It just did not end well. so I tried using a dremel to get a better cut and I just am not good with any hand tools really.

I just used scissors on mine, it works OK, you just have to be careful.
attachment.php

You also don't want to make it fit tight in the slot, you want it to over hang the insides to allow for what ever method of attachment you use.
Even if someone else cut it for you, you may have to trim it a bit for however you mount it.

Lynn
 
This thread is more than 2 years old.

Your message may be considered spam for the following reasons:

  1. This thread hasn't been active in some time. A new post in this thread might not contribute constructively to this discussion after so long.
If you wish to reply despite these issues, check the box below before replying.
Be aware that malicious compliance may result in more severe penalties.
Back
Top