My ROTJ Boba Build

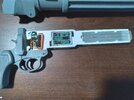
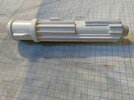
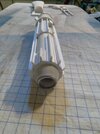
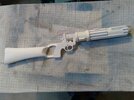
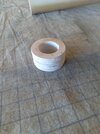
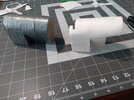
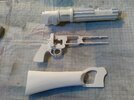
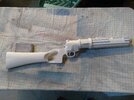
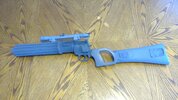
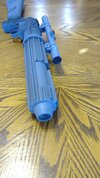
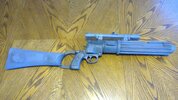
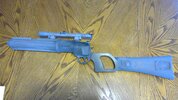
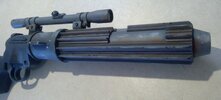
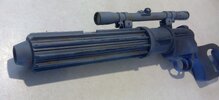
Wanted to post these before I forget, I have quite a bit going on today so I'm not sure if I'll be able to spend much time building. I think the barrel is coming along nicely, I also wanted to snap a pic of how the pieces kind of look together, there's still quite a bit to do before I actually do glue them together. Check it out!
Blaster barrel 05.jpg Blaster barrel 06.jpg Blaster barrel 07.jpg
 
Wanted to post these before I forget, I have quite a bit going on today so I'm not sure if I'll be able to spend much time building. I think the barrel is coming along nicely, I also wanted to snap a pic of how the pieces kind of look together, there's still quite a bit to do before I actually do glue them together. Check it out!
View attachment 238957 View attachment 238958 View attachment 238959
Looks awesome. I'm curious about how you made the barrel tip.
 
Looks awesome. I'm curious about how you made the barrel tip.
Thank you, sir! Appreciate the compliment as always!

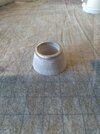
The muzzle I talked about a little back in post #99, but to elaborate a little further; it's 7 circles of sintra super glued together, the diagrams have the measurement at 0.833", I believe I settled on this being 42mm. I then drilled a hole in it for the bore, and sanded it to shape. I wanted to add the metal ring, so I cut of the tip of the muzzle to allow for the ring and glued them together. I then finished shaping the metal and sintra together to the final shape with my dremel and hand sanding. It needs a little more shaping, everything is still a little rough, but this is also why I look forward to priming, I think primer helps highlight flaws and uneven areas.

Blaster Muzzle 02.jpg Blaster Muzzle 03.jpg
 
Thank you, sir! Appreciate the compliment as always!

The muzzle I talked about a little back in post #99, but to elaborate a little further; it's 7 circles of sintra super glued together, the diagrams have the measurement at 0.833", I believe I settled on this being 42mm. I then drilled a hole in it for the bore, and sanded it to shape. I wanted to add the metal ring, so I cut of the tip of the muzzle to allow for the ring and glued them together. I then finished shaping the metal and sintra together to the final shape with my dremel and hand sanding. It needs a little more shaping, everything is still a little rough, but this is also why I look forward to priming, I think primer helps highlight flaws and uneven areas.

View attachment 238960 View attachment 238961
I see. Sorry, I must have missed that post somehow. Again, great job.

Several years ago, I modified a Hasbro BF blaster by adding a new barrel and stock to the grip/breach portion. I retained the electronics with lights and sounds. For my muzzle, I used the top of a small plastic megaphone I found at Dollartree. I now have a more accurate resin blaster, but I still have the other one for old times sake. LOL
Don't be sorry, it happens! As a maker, you look for anything that looks similar to what you're building, I thought about doing something like you did but figured it was just as easy to make it. I imagine the megaphone top worked out pretty good though!
 
For this next part, I need to give a very big thank you to Irongladiator, he very graciously sent me pictures of his Sidewinder blaster along with measurements, because there was a part that wasn't lining up on the templates, so I needed to figure out what was going on.

It all has to do with the breech and what I think is part of the mechanism to keep it closed on the actual flare gun, here's a picture:

Blaster.JPG

On the blaster, they appear to line up with each other, and after getting the measurements from Iron, I was pretty certain that the bottom curve of that piece just needed to be brought down that 1/8 inch. This made everything line up much better when I put it all together, even though I did shave off a little bit of the extra I added, I would rather the piece be too big than too small.

Actually making the breech was a pain. I needed it to be hollow for the electronics, so I made a cardboard mold and formed a piece of sintra around it. I then cut it to the appropriate shape, added in extra material for the curved part and sanded it down.
Blaster Breech 01.jpg
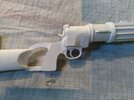
It all took forever, and it's not perfect, but I got it REAL close. I will need to do a little filling here and there, and sand everything more, but I want to put primer on before sanding any further. I also still need to work on the grip, which I haven't even started yet lol.

Blaster Breech 02.jpg Blaster Breech 03.jpg Blaster Breech 04.jpg
 
Last night we held our 4-H's Halloween party, which I did don my Fett for, unfortunately my wife and I both didn't get photos (I didn't even have my phone, and my wife's was running the music lol) so I will have to see if I can get the ones that were taken. This also drove me to get my blaster to a point where it could be used, even if it isn't complete. As a result, I put primer on so it at least wasn't white, however I still haven't made/put the greeblies on (Edit: decided just to buy the greeblies, figured it was worth the cost.) I do have to do some sanding still, so hopefully I won't be gluing them just to the primer.
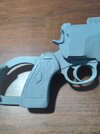
Blaster Primer 01.jpg


Blaster Primer 05.jpg Here's a pic of the finished grip! It's 2 pieces and I scored the sintra with a paper clip to get the lines.

I did also manage to get the electronics put in, and they work!
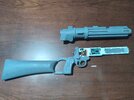


Blaster Primer 02.jpg Blaster Primer 03.jpg

The barrel and breech are glued together and it slides over covering the electronics, I then have it held together with a dowel at the breech pivot point. I had originally planned to put a Chicago screw in there, with the dowel being my temporary solution, but it worked so well I'm considering just putting in a larger dowel. Here is also where I have to admit I couldn't get the 2 pieces to fit together completely. There's still about 1/8" at the end of the breech, you can see it in this pic:

Blaster Primer 04.jpg


I'm going to be able to sand down the back to make it line up a little better, but there isn't much room. I've tried to figure out where it is hitting so it will close more, but I've taken away a decent amount of material from the inside that I'm afraid to go further. I had to just accept it as it was and move on, it's as good as it is going to get. Overall, I'm pretty happy so far, the rifle does have a certain amount of wobble to it, particularly at the D-ring, not sure if there is really anything I can do about that though. Maybe if I paint it with Plastidip would that maybe strengthen the sintra a little? If anyone has any advice for that it would be appreciated! Thanks for reading!

EDIT: One more thing! I almost forgot! I also recently bought a little amplifier with a Bluetooth headset, there was a great deal on it on Amazon so I pulled the trigger. Last night I was able to test run it and it worked out great! The speaker fit perfectly in my thigh pouch, and I could wear the headset comfortably in the bucket. My only qualm was that I kept hitting the mute button when I put it in the pouch lol.
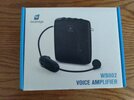
Boba Amp.jpg
 
Last edited:
Got my scope from Sidewinder and it looks great! Thanks Simon! My phone is in need of an upgrade, it currently won't even take pictures, so here is the one he sent me of it.
Blaster Scope.JPG
I didn't realize that the ends wouldn't come hollow, but what I've guessed is this is done at special request from the buyers. So I guess the question then is, do most people drill out the ends and put in lenses? Or just leave it as is? I'm pretty sure the lenses are painted over on the prop anyway, but at the same token, having actual lenses probably looks a lot better. Also, are these parts 3D printed? Knowing what it's made of will help me determine how to go about drilling the holes out. Thanks to anyone that has any advice!
 
Mythosaur
I think you are right in that the lenses may have been painted or something that wasn't drilled out. I opt'd to have Sidewinder install a couple of lenses for me. Simon says he got the lenses off of eBay and the item was called "Round Glass Cabochon 20mm". Furthermore he states that he got the flat versions of these and to be careful as you could inadvertently buy the Dome ones, which it is my understanding are the ones you DON'T want.

I wanted the glass lenses to be put in so that if I ever have photos taken of me pointing the blaster that maybe it'd give off that glint you see on scopes and daylight. Here are a couple pics....
Sidewinder - Iron's EE3 with Lenses.JPG


Best,
-Iron
 
Mythosaur
I think you are right in that the lenses may have been painted or something that wasn't drilled out. I opt'd to have Sidewinder install a couple of lenses for me. Simon says he got the lenses off of eBay and the item was called "Round Glass Cabochon 20mm". Furthermore he states that he got the flat versions of these and to be careful as you could inadvertently buy the Dome ones, which it is my understanding are the ones you DON'T want.

I wanted the glass lenses to be put in so that if I ever have photos taken of me pointing the blaster that maybe it'd give off that glint you see on scopes and daylight. Here are a couple pics....
View attachment 239314

Best,
-Iron
I did remember seeing that in your thread, thanks for the refresh though, I couldn't remember what those guys were called and was going searching! (y) I guess really this is kind of my own personal preference on what I want, as always I'm indecisive though. :lol: I will say I've had the privilege of going to Skywalker Ranch and I've seen the rifle in person. It was a long time ago now, but if memory serves me correct you can't actually look through the scope. I just can't remember if it is due to paint or something else.
 
Actually, I believe I just remembered. I think there are pieces of paper or cardboard covering the lenses. They did it so there wouldn't be a shine back at the camera.
 
Actually, I believe I just remembered. I think there are pieces of paper or cardboard covering the lenses. They did it so there wouldn't be a shine back at the camera.
Mythosaur
That's cool and actually makes sense. But in the really real world you could see through your scope. Only, and sadly Star Wars is not the really real world.
1698170116822.png
 
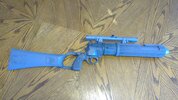
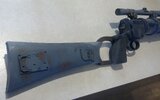
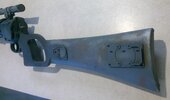
I've made good progress past few days, I have the blaster complete and base layers of paint on. I used a mixture of Primer, Black, Grey, and London Grey (All Rustoleum) for the main portion of it, the scope is solely Primer with the black areas places where I used liquid mask. First time ever using any kind of masking fluid, this one being Winsor & Newton, and it worked great. I'm pretty stoked with how it's come out so far and am excited to start laying the details down, which I plan to do the rest by hand. I also did put lenses in, which are circles of plexiglas I cut out, took a while but it really adds to the overall look.

Blaster Base color 01.jpg Blaster Base color 02.jpg Blaster Base color 03.jpg Blaster Base color 04.jpg
 
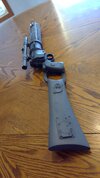
Finally got all the finishing touches on my blaster, and gave it a clearcoat. I'm pretty happy with how it turned out, let me know what you guys think! :D

Blaster Complete 01.jpg Blaster Complete 02.jpg Blaster Complete 03.jpg

Blaster Complete 04.jpg Blaster Complete 05.jpg Blaster Complete 06.jpg
 

Your message may be considered spam for the following reasons:

If you wish to reply despite these issues, check the box below before replying.
Be aware that malicious compliance may result in more severe penalties.
Back
Top