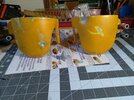
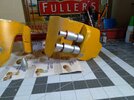
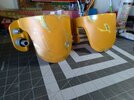
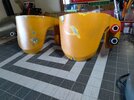
My ROTJ Boba Build

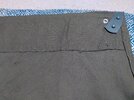
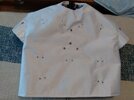
Well, I got some color in my suit! It came out pretty interesting, it looks fairly blue in some lights, but in others it looks just grey. I think it could stand to have a little more grey in it, but I'm not sure yet. What do you guys think?
Dyed Flightsuit 1.jpg
Dyed Flightsuit 2.jpg
 
Mythosaur
That is a really good likeness.

Nice job!

-Iron

Thanks man! What I find most interesting about this whole thing is that my suit is actually blue, it just sometimes looks grey. I did put grey in it so it has a grey tinge to it, but I think the same thing happens with Boba's suit because his is just dirty blue that looks grey.
 
Thanks man! What I find most interesting about this whole thing is that my suit is actually blue, it just sometimes looks grey. I did put grey in it so it has a grey tinge to it, but I think the same thing happens with Boba's suit because his is just dirty blue that looks grey.
Perception from a camera lens versus human eyes is similar, yet way different. Still....great job!
 
the stunt suit is a lot different than the suit Jeremy wore for the Jabba scenes, which was the 'hero' suit.

you got a good color to start with, fade it some more
Ah, you're right! I wasn't thinking about that being the stunt suit. It still is fairly similar to other pictures, so I agree it's a good start, but I'm unsure as to my next steps. I really want it to look good after putting all that work into it. So you think it needs to be lighter? I think it could still be greyer, so I was thinking about putting a little more Pearl Grey in it, but maybe I wash it a few more times and then add some more grey? I don't know yet, any advice is helpful, thanks!
 
Just completed my long overdue upgrade to my flak jacket, here's flak jacket 2.0!
Flak Jacket 2.0.jpg
This project was a lot more difficult than I anticipated, and I probably would have benefited from starting over, but it would have been such a waste of material. I also had no intention of altering how my armor attaches, so I didn't have to figure that all out again. Mostly it was so difficult because this tackle twill is probably the most ridiculously problematic material I've ever worked with. I bought P.S. Poly-Twill and got it from Stahl's. This stuff is great for the look and feel, it's very plastic-like and reminds me a lot of the actual vest. However, this also means that if you mess up at all, you're left with needle holes because the fabric really doesn't 'heal' at all. It also is very unyielding, so it doesn't like to do what you want it to do around curves. Because of this I did the arm holes and sewed the sleeves onto the vest by hand, I was so afraid I would mess it up on the machine. At least it's done now and I just need to get it dirty! (Also time for a new neck seal!)
 
Put some of the last needed velcro into my suit and decided to get suited up (with the help of my son) and see how everything is fitting. My knee armor has yet to be fixed and velcro attached so I'm without those, but I am pretty happy with how everything is turning out. I pretty much just have some weathering and a little paint left to do, and putting in my attachment for the hoses (which I am also without here). Big thanks to the wife for grabbing some pictures for me.
BF all.jpg
BF back left.jpg
BF back right.jpg
BF front left.jpg
BF front right.jpg
BF front.jpg
 
Irongladiator, yes that is definitely next on my list of things I still need to purchase! There are a few other greeblies I need as well, and also need to finish my shin tools. The list of things I need to finish just gets longer the more I think about it! haha!
 
I needed to find the cape tutorial I used to see if it gave any instruction as to where the holes for the cape greeblie are (it doesn't) but it took me forever to find it and this is indispensable info for us ROTJ guys. I think this should be stickied in soft goods, but I'm putting it here for anyone that needs it. I lost the thread where I got it from again, but I believe it was Art Andrews who put this together, so a big thank you to him for this.
 

Attachments

  • Return of the Jedi Cape Tutorial.pdf
    301.4 KB · Views: 107
Mythosaur
Ah yes. I think this is the original link you were talking about:


-Iron
 
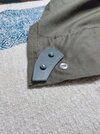
I spun my wheels a little trying to juggle a few different things, but I did manage to make a cape greeblie. It's something I've always wanted to add, just never got around to it until now. I think that it looks like the PP1 cape clip with the arrowhead part broken off:
PP1 cape buckle.jpg
I made it out of sintra and the screws I happened upon rifling through some old screws I have. The nuts and washers I had to buy, and they're reasonably tight, but I put some threadlocker on just in case.
Cape Greeblie 01.jpgCape Greeblie 02.jpgCape Greeblie 03.jpgCape Greeblie 04.jpg
 
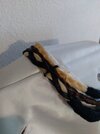
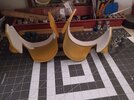
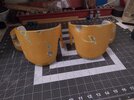
Reconstruction of the knee armor has begun! I also didn't really like how my braids were attached after looking at pictures, so I took a different approach. I always wanted to be able to take them off if I ever needed, so I wanted to avoid sewing them on and zip ties. Originally, I had some velcro sewn onto some threading around the braids and on the vest. Now, I have a couple holes in the vest I poked through with an awl, which I then blanket stitched around to keep from fraying. Then I poked a piece of leather lace through and tied the braids on on the inside. It not only looks cleaner, it allowed me to remove some of the excess thread from the braids that I didn't need. Much more happy with how it looks now!

Knee Armor Reconstruction.jpgNew Braid Attachment.jpg
 
I was hoping to get my knee armor done today, but I've made good progress over the past few days.

Knee Armor Revamp 01.jpgKnee Armor Revamp 02.jpgKnee Armor Revamp 03.jpg
The knee armor was one of the first things I made for the costume and they've come a long way since then, they also gave me the confidence to be able to pull off some of the more complicated pieces of armor. I originally used WOF's templates and used them again for the reconstruction.
Knee Armor Revamp 04.jpgKnee Armor Revamp 05.jpg
I added some weathering using a wet-on-wet technique, I'm not particularly talented with this kind of stuff, but it came out alright. I also added a clear coat to even everything out
Knee Armor Dart Launchers.jpg
My dart launchers are made of pieces of PVC pipe shoved onto a dowel, the tips are pieces of aluminum pipe which were leftovers from when I made my jetpack harness. I countersunk the pieces into the dowel so the tips would stay in place (hopefully). The cone shaped launcher is actually the tip from a giant novelty pen glued to a piece of dowel, the two pieces separated and I had to re-glue them, partially why I can't continue. Hopefully tomorrow I can get it put on and add in my velcro, then I should be good to go.
 
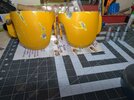
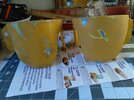
Been able to get a few things done lately, finished up my knee armor here's a few more pics:

Knee Armor Complete - 01.jpg Knee Armor Complete - 02.jpg Knee Armor Complete - 03.jpg

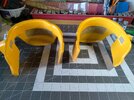
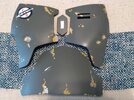
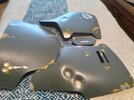
I also added the dents to my chest armor and took back that white scratch on the bottom plate quite a bit, much more happy with it now. I also have been clear coating everything which has been improving the overall look of my armor, fixing all the gloss/finish issues and just 'flattening' everything out better.

Chest Armor 01.jpg Chest Armor 02.jpg

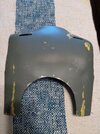
My back armor was also in dire need of a repaint and clear coat:

Back Armor Complete.jpg

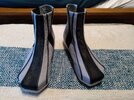
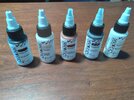
And last, I've begun painting my boots. I've been utilizing the CA Boots/ Weathering Tutorial as a guide to help out, but so far I only have some black on them. I also asked Man of War Studios what he would recommend to paint the boots and said to use a water-based acrylic paint for airbrushes (Thanks Christian!) and brush it on. I found these Golden High Flow Acrylics, which is very thin paint and seems like it would go straight from the bottle into your airbrush without much thinner if any at all. Seemed like exactly what I was looking for, but I will say this paint is kinda expensive. Each 1 oz bottle is around $7 before tax, but honestly I didn't mind spending the money. I've cut corners all over the place doing this hobby, but I didn't want to do that here. Now that I've worked with the paint a little, I gotta say it was ABSOLUTELY worth every penny. This stuff just goes on like a dream, since it's already so thin it spreads out pretty good, but if you get your brush just a little wet, you can really spread it out. Highly recommend this paint for your boots! Also, I haven't used it yet, but I could see the Shading Gray being useful for other parts of the costume.

Boots - 1st coat.jpg Boots - Paints.jpg
 
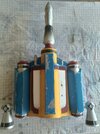
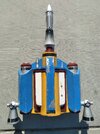
Been working hard on getting my jetpack all finished, I think I just have to weather the rocket and I'm done! Check it out!
Jetpack 98% - Inside.jpg Jetpack 98% - Outside.jpg
One pic is inside and one is out, and I'm pretty happy with how it's come out (gonna be time to update my jetpack thread soon too). I also just got a box of fun from RafalFett (Thanks man! The pieces look great!) so there will be more coming soon!
Box of Fun.jpg
 
Last edited:

Your message may be considered spam for the following reasons:

If you wish to reply despite these issues, check the box below before replying.
Be aware that malicious compliance may result in more severe penalties.
Back
Top