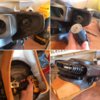
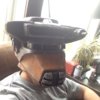
Boushh Boushh Helmet/Costume Build by alvo

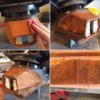
The leather I ordered came in the mail very quickly. I've heard some people say that this part of the build is/was the most difficult, but I find it quite easy and straightforward. It could have to do with the type of leather I am using. I use a very soft deerskin. It is soft, flexible, and forms very easily to the helmet. I have templates for cutting the leather, one piece goes on the top of the snout, then two separate pieces for the bottom/sides. I used to do the bottom/side pieces as one piece. But I've found over the builds that two pieces are far easier to work with, even though you do get a seam running down one part. But the seam is subtle enough that I think it is forgivable.

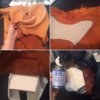
For the top leather pieces I always start in the middle where the leather meets the helmet. There is a little lip/edge where the leather and helmet meet up. I start by using some CA glue and run it along that lip/edge, then tuck the leather up into the lip with a little spudger tool. After that, I lift the leather and apply some contact cement to the leather and helmet. After waiting a few minutes I lay the leather down and smooth it out. Then I do the same to either side, taking special care to line up where the leather and helmet meet. There is always a bit to trim on the sides, but with a nice sharp blade it is very easy to do. Then I tuck the leather into the snout/tusk area and secure it with some CA glue.
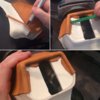
IMG_7756.JPGIMG_7757.JPG

The bottom pieces can be a bit more tedious, I guess. The important part is to start at the right place. If you don't, your lines and cuts may not line up properly. You can see in the second picture where it is best to start. I always start there, just at the corner, and work my way up lining up the two leather edges with CA glue. After the edge is lined up I go ahead with the contact cement. You've got to sort of do it in sections. The front portion first, where the top leather and bottom leather meet. Then the small section going back towards the ear greeblies where there is till a lip/edge to follow. Then back and up around behind the ear pieces. I don't tuck anything up into the helmet until I've got both sides on. You can see the seam I mentioned in one of the photos. Again, not ideal but it makes the leather process much less frustrating. When I tuck the leather up into the helmet I cut a few notches in the leather to make it easier to fold up. Tucking the leather in behind the ear pieces and up the helmet is difficult. The leather tends to bunch in less than ideal ways. Be patient here, and take your time. I find I have to spend a lot of time trimming leather here and there to get it to fit just right. Ideally you don't want any folds to be showing. This is where working with the soft deerskin really pays off. Sorry, I didn't get a picture of it. I'll add one before I get the neck cowl on there.
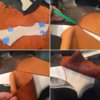
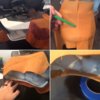
IMG_7758.JPGIMG_7759.JPG
IMG_7749.JPG

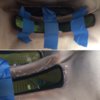
I also installed the lenses. This part isn't really my favourite. I don't know why, it isn't particularly difficult. Just some hot glue and a bit of patience. I start with the top lens and just use a couple dots of glue to tack it down. Then I just go a bit at a time glueing the rest. It isn't pretty on the inside, but that doesn't matter.

For the bottom lens, I tape it first. Then just go in sections again with the hot glue. You kind of need a small glue gun to get in there. I guess that's what makes it frustrating to do, it's hard to get the gun where you need it. haha. Again, it's not super pretty on the inside. With the leather and lenses on, it it almost there!
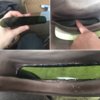
IMG_7760.JPGIMG_7761.JPGIMG_7755.JPG
 
Last edited by a moderator:
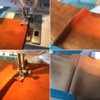
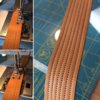
The neck cowl and strap that runs behind the helmet are from the same leather used on the snout area. For the neck cowl the measurements are about 6.5" x 19". I cut the piece in half and sew them together. Then, I sew two corresponding lines down either side of the seam. The strap is 1" wide with 6 lines sewn down the length. Sometimes I only get 5 lines, but I think on the original there are 6.

IMG_7775.JPGIMG_7801.JPGIMG_7802.JPG

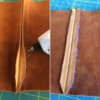
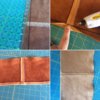
Once everything is sewn I use a hot glue gun to finish the edges on the neck cowl.

IMG_7803.JPGIMG_7804.JPG

Before I weather/dye/wash the leather I install the rangefinder. For this I pilot a hole in both the helmet and rangefinder piece and screw it to the helmet. This makes it secure enough for any trooping, and it won't ever pop off. It is a tight fit, as you can see, to get an electric screw gun in the helmet. I've got a pretty small one that fits just right. Be careful not to over tighten and make sure your pilot holes are big enough otherwise you will crack the resin moulds.

IMG_7805.JPG

Before I wash the leather I like to use a bit of sand paper just to rough it up a bit. Then I use an umber wash to dye the leather. I love little splotch marks on the leather, I think it really honors the bounty hunter feel. While it may not be a true reflection of the screen version, for me it only enhances the overall look. Once everything has had a chance to dry I'll spend some time gluing into the helmet.

IMG_7806.JPG

At this point I've done an inventory of what is left to complete on this project.

- Helmet; install snout/tusk, neck cowl, strap, install helmet fan, pad helmet for comfortable wearing
- Belt; I'm still not sure how to proceed with the belt buckle.
- Tanks; I've got the pieces, I just need to go to the hardware store to purchase some PVC tubes the right size. I've never done a tank build.
- Pants still need to be finished, I mostly just need to use my friends leather sewing machine
- Spats - weather the spats, purchase boot disks

I feel like I'm pretty close, but also have a lot to do still. It is taking longer than I anticipated.
 
Okay, I'm calling it on the helmet. I've got padding in there now, so it is totally wearable, plus I put in the fan. I will do lights eventually, but right now I'm calling it.

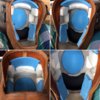
For the padding I used a combination of different pads. The white is just a 1" camping foam, and the blue is a higher density ½" camping foam. At the front of the helmet, just behind the top lens, I stacked about 5 layers of the blue foam and formed/cut it to the contour of my forehead, then wrapped it in black hockey tape (eh!). It makes for a nice comfortable fit. All the pieces were glued in, except the piece wrapped in hockey tape. That is held in place with some velcro, that way I can take it out to install the lights and also make small adjustments on how tight or loose I'd like the fit.

IMG_7830.JPG

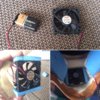
For the fan, I purchased it off of eBay for about $20 I think. The fan fits just perfectly in the snout, and with the holes drilled in the tusk it creates good airflow. It runs of one 9V battery, and also has a switch for turning it on and off. Everything tucks in nicely. I was going to try and screw the fan to the inside of the helmet, but that wasn't really working out for me. So I ended up just using some blue foam to mount it on the inside. It worked perfectly. Then some velcro to hold the battery in place, and we're in business. The fan was a big deal for me. Not only for staying cool, but helmets and masks make me feel just a little claustrophobic so this will help for sure.

IMG_7831.JPG

Here is a little video of the fan

.

FullSizeRender 6.jpg
 
Last edited by a moderator:
Beautiful job. I just finished working on my Boushh helmet as well. I took a lot of inspiration following along with your paint job. Thank you very much for the awesome pictures...it really helped me feel comfortable with what I was doing!
 
Beautiful job. I just finished working on my Boushh helmet as well. I took a lot of inspiration following along with your paint job. Thank you very much for the awesome pictures...it really helped me feel comfortable with what I was doing!

That's awesome! I'm really happy that my thread has been useful to you! After all, that's why we post here. I know I often reference other builds on here, as well. Way to go!
 
Happy Halloween everyone! Just had to post a picture of me and my kid from earlier today. My costume is only about 75% finished but I couldn't resist making an appearance at my kids school/Halloween carnival. Lots of fun and a good chance to test out the feel of the costume. I can already tell I'll need to adjust the should armor a bit. All in all, first good outing.

ac4aaf821060d1bb65e5f73b34d81ef5.jpg


Sent from my iPhone
 
So much awesomeness in this build....you are going great!
Absolutely fantastic build thread! Super enjoying it!:)
Awesome work there!
Thanks everyone for the encouraging words! I haven't had a lot of extra time this month to continue on the build, but I plan on picking up again in the New Year. I've got a few more things to finish, and what I'm thinking will be a fairly major overhaul of my shoulder armor (there will be cutting, and I'll probably have to re-paint the whole thing). My shoulder armor is just too high on my neck and sits uncomfortably under my chin and jaw. If I bring it down 1/2" it will be a lot more comfortable. Not really looking forward to that part, but I think it needs to be done. Keep tuned in, I'll have lots of good posts about the tank build coming up in the next couple months. The tank will be a first for me, but I'm really looking forward to it. I also realized I forgot to install a small piece onto the scope on the helmet, but that won't take very long. I might have a couple more helmet builds coming my way in the new year as well, so I'll have that to look forward to as well.
amazing, starting my build soon!
Awesome! It is a beast of a build, best of luck to you my friend!
 
Aaaaaaand, we're back!!

Alright, I've had about a two month hiatus from anything Boushh related. But I'm starting up again. Firstly, I just finished the first Boushh helmet commission of 2017 (this might be number 6 for the running total) and I have 2 more back to back coming up that I'll be starting on monday.

But, between these commissions I had a bit of time to re-visit the shoulder armour. To recap, the shoulder armour was too tall/high around my chin and neck. I thought that trimming it down would make it more comfortable to wear. Currently, when I wear it, my head is limited to a very narrow range of motion. I also end up having to stand in a fairly ridged posture so my jaw isn't constantly hitting the armour.

IMG_8334.JPG

So I set to revamping the shoulder armour this afternoon. I've thought a lot about how exactly I was going to approach this, so I felt like I had a pretty good plan in place. My plan was to reduce the height of the "collar" by about 1". To start I taped a cut line with some black electrical tape, then I set to cutting the "collar" with a rotary tool and cutting wheel attached.

IMG_8335.JPGIMG_8336.JPGIMG_8337.JPG

Next, I fitted the cut away portion of the collar into the inside of the shoulder armour. I glued it with some CA glue, then used some plastic epoxy putty to secure the bond and create a seamless look.

IMG_8339.JPGIMG_8340.JPG

Once the epoxy putting cured I sanded it down, then put on another coat of primer.

IMG_8345.JPGIMG_8348.JPGIMG_8349.JPG

I'll have to repaint the piece now, but that's alright. This isn't a highly detailed part of the build, so it won't take long. It is always best to get it right, even if it means having to go back a step.


IMG_8337.JPG


IMG_8339.JPG


IMG_8340.JPG
 
6b20a73cf913cccdd5e448832cc014c1.jpg


And there we have the re-finished shoulder armour. Nice to have that taken care of, now I'll be able to proceed with the tank build when ready. [emoji1303][emoji1303]


Sent from my iPhone
 
That's commitment. Doing modifying work like that to finished pieces always scares the heck out of me. You did a really good job!
 
This is so amazing and very impressive. Great work!

Thanks!

That's commitment. Doing modifying work like that to finished pieces always scares the heck out of me. You did a really good job!

Yea, I really didn't want to have to modify the armour but I really saw no other way around it. Luckily the paint job is pretty straight forward. And with the modified collar, it is much more comfortable now to wear with a helmet.

Also, hooray for page 4!!
 
wow looks great, I am making a boushh for my daughter. I will be checking this post a lot for all the great info, The pants is the part I am worried about the most
 
OK! So after a busy New Year (3 Boushh commission builds back to back to back) I'm back to working on finishing my own Boushh costume. I'm so close to completing it.

I took on the belt/belt buckle last week, and am pretty happy with the results. I didn't want to spend $30 to get a 3D printed buckle, so I thought I'd take a crack at building one myself.

I picked up a raw leather strap from Tandy Leather for about $30, as well as a plain unfinished belt buckle for a couple bucks. I've found that Tandy Leather really is a good one stop shop if you're wanting materials to build the belt. For the belt I used a Saddle Tan color dye (also from Tandy). I put on a couple coats of the dye (the leather really soaks it up) to make the color even. It goes on dark, and lightens up quite a bit when it dries.

IMG_8626.JPGIMG_8635.JPG

For the buckle, I started with a piece of ABS model plastic (2mm) cut to the same size as the buckle face. I cut out the oval shape with a router tool and sanded it smooth by hand. I used some contact cement to glue it to the buckle, clamping it for a couple hours while it cured.

IMG_8631.JPGIMG_8632.JPG

I didn't want any seams on the edges, so I puttied and sanded all along the outer edge.

IMG_8634.JPG

For the half round "button", we'll call it, I used the top of a bolt. I used some epoxy putty to form the round top, which I later sanded smooth. I cut the top off with a hack saw, then sanded the base smooth so it would sit flat.

IMG_8639.JPGIMG_8640.JPG

For the paint, it was a pretty simple task of primer, black base then silver dry brushing. Finished off with a matte clear coat. Easy-peasy-lemon-squeezy, as my kids say.

IMG_8643.JPGIMG_8645.JPGIMG_8648.JPG

The only major components I have left on the build are the tanks and pants. I've started the pants, but sort of stalled on them when I ran out of leather. I purchased some leather to finish them, but I was disappointed that the leather would not match perfectly. So I haven't moved forward with them yet. Then, get this, about a month ago I thought I'd just have a look on ebay and see if I could find a pair of leather pants that were similar in color so I could get some leather that would match so I could finish the pants. I did a quick search "tan leather pants" and the very first item on the list was another pair of the exact same pants I purchased 4 months ago! Talk about fluke! And only for $15! So I've got those ready and am really happy I've got matching leather now.

Anyway, more to come. With being this close to completing the build I am more determined than ever to finish. It's been a lot of work, but I'm really hoping by the time I'm finished that this will be the most complete and thorough build thread out there.


IMG_8635.JPG


IMG_8631.JPG


IMG_8632.JPG
 
This thread is more than 5 years old.

Your message may be considered spam for the following reasons:

  1. This thread hasn't been active in some time. A new post in this thread might not contribute constructively to this discussion after so long.
If you wish to reply despite these issues, check the box below before replying.
Be aware that malicious compliance may result in more severe penalties.
Back
Top