Hope all is well- It's been right at a month since the last update.
Following up on the previous post, I finished forming the PP-2 style dents on the knee guards which finished off the remainder of the dent making process for the hardparts. Going to look over the references once more and be sure I didn't miss any smaller details. But over all I'm pleased with how it turned out- couldn't be happier.
In terms of other parts of this build, some exciting updates for parts have come together.
Flak vest
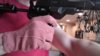
You all I'm sure know batninja work; I was fortunate enough to secure a spot on his retirement run. I have a spare vest in the same size I got sometime ago for my ESB build however I missed it up. I figure I'm going to put it to use and use it as a practice vest to mount the armor on correctly before doing the attachment method I want (Grommet/screw) for the finished build.
Misc found parts; Kaiser gun, JP greeblies updates
The Kaiser sling gun has easily become my favorite Fett blaster and found part of this build. Through vigilance, I sourced a Kaiser unit with a original proper orange trigger oppose to the black variant. I'm curious to why they went from doing black to orange but then I thought it was probably done that way to show it wasn't a real gun, like how they do on toy guns for kids.
In addition, the stock has an mint strap with a nice shine to it. This stock likely won't be trooped with, but kepted for collection.
Underneath the jetpack are some greeblies I'm sure most of you know about. Although no one will ever see them, we nerds appreciate the fact they're there. In addition to the blue (which will be changed to red) greeblie, I was able to source a ITT Cannon 5 hole adapter with the help of tennantlim.
Flamer Build. V6
This flamer has been an obsession of mine since I started trying to replicate it. The goal is to make it as accurate to the Kenner references as possible, made with mostly metal parts to look and feel like an actual weapon.
As seen in my previous mock-ups, a plastic nylon end-cap is used at the tip of the base pipe. I have gone away from it and changed it to a copper cap that I have modified using a dremel tool. The cap will eventually changed to a goldish color to match references. I'm unsure of the shape of the cap however, it is for sure metal.
I switched to
MachineCraft brand copper-tipped missile. Compared to the original, this thing is so light it compliments the goal of making a light left gauntlet set up well. The base pipe has also been switched back to the aluminum for aesthetic matching.
Lastly, Jb Dubz and I quested to find the actual parts to the rear greeblies of the piping. After much search and speculation, Jb discovered the body portion of the greeblie. With his lead, I was able to track down the attachment atop of the hex bolt, as well as the nut to the very end of the left that closest to the pipe. The details of these parts, including part #, will be shared in time once the CRL is complete and all the details are verified. It was a partnership effort to find and I thank Jb &
Art Andrews very much for helping me to make this the best flamer it can be.
To come:
>Bobamaker Jetpack kit and gauntlet parts arriving soon.
>Flight suit ordered, made by Arkady. Will likely be dyed by me to achieve proper color.
>Continued search for flamer parts.
>Paint work.
To be continued...