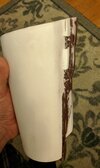
Photos prior to applying resin and fiberglass, widened the enclosure lip for magnet placement to keep the gauntlet closed and hinged the opposite side. More pics to come...
Fiberglass applied inside and out. Currently sanding/shaping prior to bondo with a lot more shaping to go. The clam shell hinge/ magnets work like a charm!
Here are the first pictures after application of paint to better see defects... will have a lot more shaping and coloring and weathering to go... also the magnets / clam-shell works great which makes it quick and easy to slip the gauntlet on and off without having 2 separate pieces to keep up with.
Photos taken in mirror, left gauntlet.
Will be adding more details to gauntlet, silver rub n buff applied, also getting ready for rust coat coloring, then a lot of weathering. More pics to come.
Toothpaste applied to battle scar areas, then covered with a coat of Krylon satin brick, and misted with Krylon black and kona. After paint dried, the toothpaste areas were then wiped off with wet cloth which reveals the silver rub n buff underneath.
Still have a lot more details to apply.
More pics to come!
I was not happy with my previous scratch attempt in making a control panel for the left gauntlet so I am replacing the control panel with a more realistic look. I found these foam buttons which work well, applied silver rub n buff and weathered, also reworking the gauntlet with more details, more pics to come once I get it reassembled.
Darts applied today, I made them out of 16 penny nails and grooved them with my Dremel tool.
Flame thrower made from on old eye glass flat head screw driver, bent it, and cut off the others end and smoothed it.
I will be applying some slight resin to the taped portion and will then apply some silver rub n buff.
Everything from scratch...and what I have laying around the house.
Still a lot more work to go with touching up left gauntlet as well and applying a few more details to the right gauntlet before painting/ weathering.