A Tale of Two Tuskens

bigkidbiggertoys

Well-Known Hunter
From over at the RPF:

Seeing the Tusken Raiders in the Mandalorian and Book Of Boba Fett Has renewed my interest in the characters, especially the look of the tribe in BOBF. I decided that I would not make a specific version but more of a generic character that I could swap out the robes for the look I want. I didn't take pics along the whole way but I will try my best to describe the build process.

1) Helmet
I selected this file from Thingiverse Tusken Raider Helmet by drokle but I think this one would work just as well or better AOTC Male Tusken Raider Helmet by stormtrooperguy

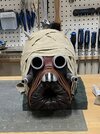
I split the model to fit on my printer and then plastic welded the joints after so I had a rock solid helmet. I printed at the fastest speed as I just needed the shape, everything gets covered up in cloth or leather after. I couldn't find duck cloth in my area so I went to the thrift store and bought a few pairs of cotton tan pants that I cut into strips. Don't worry if the colors don't match as it will add to the randomness and help break up the color after.
1186370-be414f218b657e63f4344e7f4128dcde.jpg
The leather and dye I had lying around so this thing literally cost about $10 to make.

I weathered after with a dusting of acrylic spray paints, Montana Sahara Beige and Shock Brown, because these are what I had on hand. A little bit of extra fraying and it looks done to me.
img_0891-jpg.jpg


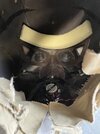
Inside the helmet I glued a bit of scrap leather to soften the edges around the eyes as I added some extra holes to gain some peripheral vision. These were covered by guaze and painted to match. Visibility is good for a Tusken. Padding for a snug fit was added with velcro so I can remove to clean.
1186374-9c223fe1b737922983979e86f3539762.jpg
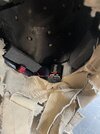
A small cooling fan was added to the mouthpiece to bring in fresh air and the wire to the switch and battery were routed under a scrap piece of fabric to avoid snagging. The battery was located at the helmet back to help counter weight as this design is front heavy.
1186375-e02958026798e197528b88deb1612ed1.jpg
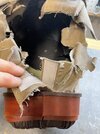
Extra vent holes were added in the helmet before covering with fabric. A velcro closure was added to the front and this helps to hide my chin.
1186372-53377d25cc5316b7959f5e3419fb6541.jpg

All in all it works pretty decent and is easy to take on and off.
 
Last edited:
2) Boots and Gloves
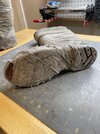
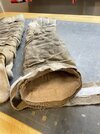
I went with the tried and true method of wrapping rubber boots (retiring my old pair) and glued the wrappings on with E6000 and some hotmelt. E6000 to the rubber and hotmelt to the previous layers of fabric. I then coated the sole with E6000 so the fabric wouldn't wear through right away although I probably won't be doing a lot of walking. This can always be built back up again later. The fabric was the same cut up pants fabric, weathered the same as the helmet although I focused making them dirtier near the ground.
img_0885-jpg.jpg


1186378-47cb9be29fd59e242267ad5bc0b3a4af.jpg

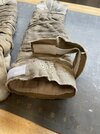
I used cheap cotton gardening gloves, sewed on a cotton gauntlet and gave them a tea bath for some color. The gauntlet gives something for the wraps to be glued to and these were put together with just hotmelt. I added a long strip at the top with some velcro and elastic. This gives just enough tension when closed up that I never have to worry about the gauntlet slipping down my arm. These were later weathered with the same method as above.
1186380-bc3c559d21f784f7e4cc4be5122a627a.jpg1186381-af5fe1dba15f90359ce696901a0d2ec9.jpg
img_0690-jpg.jpg
 
Last edited:
3) Bandoliers & Breather
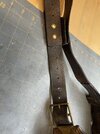
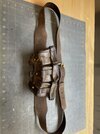
I had these on hand so just repurposed them. I had to add a strap for one of the bandoliers so it would sling over my shoulder and not be way up into my armpit. 12" of scrap leather and a quick dye and weather job and it is ready to go. I decided to wear the other one around my waist as the 3 little pouches tend to sag and look sloppy. These were better suited as a second bandolier so I put together a quick belt with some oil tanned leather I had and scuffed it up a bit. It seems to work well and fits with the look.
1186383-1fb8f426de3f207237ad02e730c950d6.jpg1186384-55d681159d3fc0a550b250bd14de876f.jpg
img_4188-2-jpg.jpg


I don't have any progress pics of the breather but this is what I used, two Testors spray paint cans cut in half and joined together and wrapped with some oil tanned leather. A couple of brass flare nuts that were painted silver and some aluminum rod bent into shape. Everything was given a light dusting of paint and wiped off except for the crevices. It is subtle weathering but I figure if this were a device to help with breathing or water capture then it would probably be kept clean and in good order.
img_0934-jpg.jpg
 
Last edited:
4) Neck Seal and Waist Sash
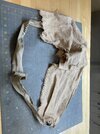
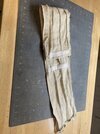
These were left over bits of fabric and the sash was sewn together to get the length I needed but since it is mostly covered by the belt it will do just fine. Besides, Tuskens didn't have very good tailors! The sash was dyed the same color as the outer robe and I added some of the fabric scraps from the wraps as a tie up in the back. This is functional.
1186386-402af573264b24ce4885e4ec368a93f9.jpg

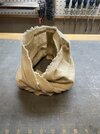
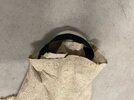
The neck seal I added some random pleats to and a velcro closure. I also left a tail that I could cross over and tuck back into the neck seal. In hindsight I think this really isn't necessary, use a length that wraps around and tucks into itself and it isn't going to go anywhere.
This works great and none of my neck is visible when I am suited up.
1186387-885a1cc3bdad1c9cea59ec36a5373119.jpg1186388-08a3431b2ce1185fe2978914b976ba6c.jpg
 
Last edited:
5) Inner Shirt and Pants
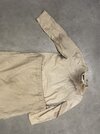
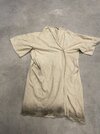
I just used a cheap white long sleeve shirt, put it in the tea bath to dye it and weathered it after with the same acrylic paints. This time I wet the shirt down a bit before I sprayed the paints as I wanted it to absorb and bleed together a bit to look more like sweat and dirt. I focused on the neck and armpits although you don't see those areas really. Just a detail that made me happy :)
1186392-a838f6fe31cbc75b725daa2318698d37.jpg

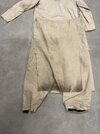
The pants I quickly sewed together and these were literally just thrown together, although next time I would probably use some sweat pants as a template or just purchase some cheap ones. The top closure is a drawstring and I sewed on a extra piece of fabric to act like a skirt or loin cloth. I have no idea if this is accurate but there a a couple of pics of the OT Tusken attacking Luke with what appears to be an extra layer of fabric under the inner cloak. I tried to make a full length tunic but too many layers and I was getting hot. This way I go the look without the extra layer.
1186393-931100a745531ffb11918058b6bd8e41.jpg
I sewed some elastic strap at the bottom so when I put on my boots the pant leg doesn't ride up out of the boots. This works great and I use it on any costume where the legs need to stay in place.
1186395-a9af4b605b64fc2b019d6d2754ab12b9.jpg
 
Last edited:
6) Inner Robe
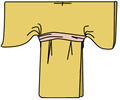
I started off by using Studio Creations robe pattern as a base.
1186399-4e374c0cb74c76700b61b887a6453b78.gif
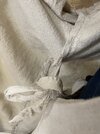
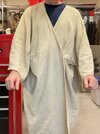
After looking at the Mandalorian Tuskens, noticed that their arms were shorter and some of the robes had more of a shape to them. It was also a bit of a pain suiting up as I had lots of extra fabric that was getting in the way when attaching the belts and bandoliers. I decided to trim up a bit, shorten and hem the arms and make more of a robe shape. I added a tie back for the inside and a velcro closure on the outside hidden by the waist sash.
1186400-453f4b518ea615d0334651f4420ea67d.jpg1186401-556d54de801bd5554ebce4e3d7d3a947.jpg1186403-127de0d838592b1b4fa80c06cd87e03f.jpg

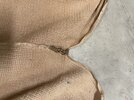
The bottom edge was left frayed and weathered heavily.
 
Last edited:
7) Outer Robe
I used TK409s pattern for the outer robe.

bepattern-jpg-318d06e9c96fd3b07fe48077f042c2ae-jpg.jpg


I bought a couple of cheap cotton weave blankets that I dyed and gave a bit of a tea bath. The blankets were sewn up the back and I added a bit of fabric where I thought that there was the most stress.
1186405-633b536408877485b4aed84d0d13e006.jpg
The sides were sewn up and I left the holes for the hands like the above pics. To keep extra fabric from falling down and me having to constantly hike it back up my arms I added some random pleats in the arms so the fabric always looked bunched up and out of my way.
img_0936-jpg.jpg


I also did not quite have enough length with the blanket fabric so I took the front tail ends, routed them back inside and attached them to the inner side seam. This adds some fullness to the outer robe and it hides the short tail ends.
1186407-f6b7dbe81461d476c9f4171c3d6dc8cf.jpg
I think by looking at the pics no one would probably ever notice. Again, the bottom was weathered and left frayed. I also added some random holes here and there. I may go back and add a little more weathering still.
img_0944-jpg.jpg
 
Last edited:
8)Gaffi Stick
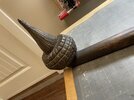
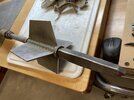
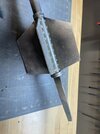
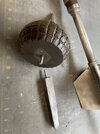
Again, no progress pics but I will try to explain what I did as best as possible. I shaped the wooden shaft from a 2x4 about 3 feet long. I cut out the general profile on a bandsaw, roughly sanded it and then routed all 4 sides with a 3/4" roundover profile bit, thus creating a round shape. There is a slight bend about half way up and another near the club end. All transitions were sanded smooth. I drilled a hole in the end to accept a 7/8" diameter electric conduit pipe, about a 18" long. I used some threaded inserts for this so the whole thing can come apart and break down for travel. The mace end is 1/8" sintra cut to shape and glued together to form an X. The pipe was slotted to fit this and the whole thing is kept in place with a 3D printed retaining ring. Dabs of hotmelt were used to simulate welds.
img_0670-jpg.jpg


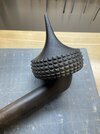
I made two club ends, one 3D printed and one was carved out of a foam floor mat so it is soft. Same with the spike, one is maple hardwood and the other soft foam for safety. I can easily swap these out as they are all threaded.
1186414-b2385b61750a2959adea49822bdef673.jpg1186415-24cc4c050a45fe81aacf0185ff67d743.jpg1186417-cc910ebe756906a30b6a67f727ca3fe0.jpg1186418-c947bd766abc8a7dfb765dad9a90a7c2.jpg1186419-7b31337fdec222d6d3fbbf8f6922eef4.jpg

I painted the wood with some stain and acrylic and rubbed it down to simulate wear. The soft ends were sealed with some Modge Podge and painted with acrylic spays. The silver ends were randomly painted with two colors of silver, dusted with black, brown and sand color, lightly sanded with a scotchbrite pad and then the edges were hit with a silver pen. The shaft was wrapped with some rope to add interest and act as a grip.
img_0674-jpg.jpg


img_0951-jpg.jpg
 
Last edited:
Conclusion -Putting It All Together

This is where the Tale Of Two Tuskens comes into play. Depending on where I am wearing this (hopefully a convention this year) and if I want to stand out from other Tuskens, I can swap out my robes for a totally new look. These are progress pics so the final fitting may differ slightly but you get the idea. I'm happy with the final result and my purpose of this thread is to encourage someone else. This is a relatively easy costume to make and you don't need great sewing skills. I also encountered build issues along the way but I didn't include those in this thread to keep it more streamlined.
Anyways onto the pics and happy hunting!
\
img_e0696-jpg.jpg


img_4188-jpg.jpg


img_e0693-jpg.jpg


img_4186-2-jpg.jpg
 
Thanks, I don't think this will meet 501st requirements but all I wanted was to do my own version and have it not look out of place in the Star Wars universe.
 
This thread is more than 2 years old.

Your message may be considered spam for the following reasons:

  1. This thread hasn't been active in some time. A new post in this thread might not contribute constructively to this discussion after so long.
If you wish to reply despite these issues, check the box below before replying.
Be aware that malicious compliance may result in more severe penalties.
Back
Top