StlFett’s ROTJ Boba Build

So the last major step in the jetpack was masking off everything for the blue layer. I used the damage template from DVH found here:

Jet Pack - DVH ROTJ jetpack damage stencils

The masking took FOREVER, but it was worth it.

IMG_2586.jpg IMG_2590.jpg IMG_2587.jpg IMG_2589.jpg IMG_2588.jpg

I used testers sea blue mixed with a little white for the main color. Then I mixed the same blue with black for the darker areas.

I still have to paint the symbols and do some touch ups here and there for some minor issues. All in all, I am very happy with how this turned out.

Still to do on the jetpack:
symbols
touchups
weathering on thrusters
weathering on vent
paint bottom half of the missile
paint the greeblies
attach everything
rig magnet system for the rear door
install and weather the light and stabilizer
 
Been working off an on over the past few weeks trying to finish up the jetpack. I got the symbols painted on, finished the thrusters, installed the vent, finished the missile, installed the greeblies, attached the door using magnets, and got the light and stabilizers installed. Other than painting the inside of the thrusters, I think my jetpack is complete. Props to those who do this on a regular basis, your prices don't do your work justice :)


IMG_2660.JPGIMG_2661.JPG IMG_2662.JPGIMG_2663.JPGIMG_2664.JPGIMG_2665.JPGIMG_2666.JPG

Next up, the armor. I received a full set from Kripton through Etsy (I am very happy with his work). I have everything primered and am now waiting to spray everything in aluminum. Its starting to get very cold so progress is slowing. More pics to come.
 
Long time in between updates.

I’ve finished my armor kit purchased from Kripton on Etsy. He had a fully trimmed set that fit me perfectly. I’ve been extremely happy with his work.


6C3296A2-4D88-4560-ADB6-920D7C88243D.jpeg AEB9F245-D377-4028-9C66-8C28226F0FED.jpeg 01BFBEBE-CC7B-4C2F-AABC-5FEAFB726531.jpeg
All of the painting was done via spray paint/airbrush. I then went over all the pieces with a mix of black and brown acrylic mixed with hydrogen peroxide wash in order to dirty up everything.
The only problem that arose was that the wash didn’t stick to the decals. For that, I spray them with a Matt finish spray and then washed them and it was ok after that.
8B6BB00E-714C-4532-BABF-3DD2355CFB34.jpeg 8260E27B-8E99-47BC-9951-72CD436A29DC.jpeg 92F9A841-9595-4AFC-A0FE-514DE9005EAA.jpeg 57EFADDB-5955-45DD-ABAE-C8D071EB8A3B.jpeg

I have now started the helmet and will post update pics soon.
 
EBFB966B-A40F-46DE-B67C-04349C9FD984.jpeg
So I’ve been slowly chugging along working on the helmet. I’ve got everything painted. All that’s left to do now is mount the visor in a way that doesn’t use tape :) , hand paint a few details, and weather everything.

Mad props to the people that do this for commission work. I think this paint job took me about three months working on one step almost every night.
3F50BFD2-A79D-4326-A992-5EB8B4B74237.jpeg
13EA11DB-677B-4A4A-B3E3-065F2E0CEFEB.jpeg
 
I’m working on mounting options for the visor. If there’s anybody out there that doesn’t mind taking a picture or two of the inside of their helmet on how they mounted it I’d love to see a few different ideas that you guys of had.
 
So I realize I’m jumping a bit, but I hunkered down and finished the suit right before celebration. Here are my submission pics.

316AC30D-3DFB-4932-ACB6-A63FEE741141.jpeg
3011FFB8-C657-43DF-B977-3E6E0BE1E297.jpeg
2C39476D-3FA0-492E-9D66-7F30E63C9911.jpeg
41B8182E-CE26-49FC-8164-5B71D6CE4B35.jpeg


I will follow up after celebration with some in between steps on the final stages of completion prior to this.
 
Well,
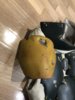
Super bad news for me. My submission response came back and I pretty much got shredded. Looks like I have to completely repaint my helmet, gaunlets, bells, knees, and most of my jet pack . Along with that I have to refinish my belt and buy new shoulder bells because they had a physical dent where there shouldn’t have been one.

I’m not sure if I want to go through all that again and spend eight months to a year doing all of that.

I’m gonna stew over for a week or two, either I’ll end up with another year project or I’ll potential be looking to sell some Boba Fett gear.
 
When you get a chance can you point out the physical dent on the shoulder that shouldn't be there?
It’s the dent on the right side of the bell. For these though I have to repaint. Not orange enough and too weathered.
I tried a new weathering technique and thought that may be an issue. Figured that would be called out.
 

Attachments

  • C5EEF475-EFC4-4277-AE1D-FF0E8707FABE.jpeg
    C5EEF475-EFC4-4277-AE1D-FF0E8707FABE.jpeg
    760.7 KB · Views: 227
This thread is more than 5 years old.

Your message may be considered spam for the following reasons:

  1. This thread hasn't been active in some time. A new post in this thread might not contribute constructively to this discussion after so long.
If you wish to reply despite these issues, check the box below before replying.
Be aware that malicious compliance may result in more severe penalties.
Back
Top